 DayPilot
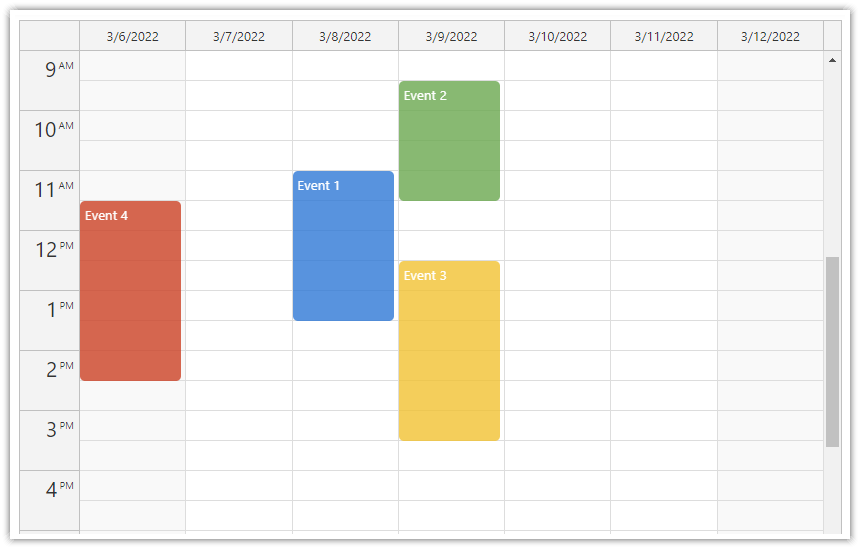
DayPilot React Calendar is an interactive event calendar for appointment booking, staff schedules, room reservations, and daily dispatch. Time runs vertically, with days or resources displayed as columns. Users can compare appointments, select free time, and move or resize events directly in the calendar.
Choose DayPilot Lite, the open-source edition under the Apache License 2.0, or DayPilot Pro, the commercial edition with additional scheduling features. Both provide React components, TypeScript definitions, day/week views, resource columns, and custom event rendering with JSX.
Try the day/week/month calendar · Try the resource calendar · Configure a calendar in UI Builder
React Calendar Features
DayPilot Lite and Pro
Day, week, and custom day views. Show one day, a work week, a full week, or a chosen number of days. Add previous/next buttons or a React date picker to move through the schedule. A month overview uses the separate React monthly calendar; the combined-view tutorial below shows how to connect them.
Resources as columns. Use a resource calendar to compare the daily schedules of people, rooms, or equipment side by side. Assign each event to a resource and let users move it between columns.
Event creation and editing. Handle a time-range selection to open an editor or create an event. Support drag-and-drop moving and resizing, and display a delete icon. The callbacks let your React application update its state and save the changes to your backend.
Custom event content. Use colors, labels, icons, and event actions to make appointments easy to recognize. Render JSX inside events, and use CSS themes to match the calendar to your application.
Working hours and local date formats. Set business hours, time-slot duration, and the first day of the week. Choose a locale for date and time formatting, and supply your application's own translated labels.
Additional DayPilot Pro Features
Grouped resource schedules. Organize rooms by location or staff by team using a column-header hierarchy. You can also group resource columns under dates when users need to plan across several days.
Wide calendars. Keep resource columns at a fixed width and use horizontal scrolling to reach more resources. This keeps a busy schedule readable without squeezing every column into the available window. You can enable progressive event rendering for fixed-width calendars to limit rendering work around the viewport.
Overnight and all-day scheduling. Configure overnight schedules for shifts that cross midnight. Display all-day events above the time grid when an item belongs to a day rather than a specific hour.
Touch interaction. Support scheduling gestures on touch devices. Combine touch support with an application layout and controls that suit the available screen space.
Export. Export a JPEG, PNG, or SVG image, embed an image in a PDF document, or create an Excel spreadsheet. The export guides describe format-specific libraries and limits.
See the feature matrix for the full edition comparison. For a horizontal timeline with resources as rows, use the React Scheduler.
React Calendar Demos and Tutorials
These tutorials include downloadable projects and explain how each example works. The edition is shown for each tutorial so you can explore examples that match your package.
React Views and Navigation
React Weekly Calendar · Live demo (Lite)
Start with a weekly calendar, a date picker, drag-and-drop editing, and custom event colors.React Resource Calendar with Editable Columns · Live demo (Lite)
Display resources as columns, switch between locations, people, or tools, and edit column names.React Calendar with Day/Week/Month Views · Live demo (Lite)
Combine Calendar, Month, and Navigator components, sharing event data between the daily, weekly, and monthly views.React Calendar with a Popup Date Picker · Live demo (Lite)
Open a compact date picker from a button and use the selected date to update the calendar.
React Content and Advanced Views
Rendering JSX in Calendar Events · Live demo (Lite)
Add custom React content inside event boxes, with icons that open event details. Compare JSX with built-in active areas.React Resource Calendar with Grouped Columns (Pro)
Explore resource hierarchies, multiple days of resource columns, and horizontal scrolling. This recipe uses older class-component scaffolding.React Calendar with a Vertical Timeline · Live demo (Pro)
Configure the Pro Calendar with dates on the vertical axis and resources as columns, for a longer planning range.React Yearly Scheduling Calendar · Live demo (Pro)
Display a year with months as columns and days on the vertical axis, with weekday labels and events that can span month boundaries.
Next.js Calendars
Next.js Weekly Calendar · Live demo (Lite)
Add a weekly event calendar to a Next.js application using the browser-side component setup.Next.js Resource-Scheduling Calendar · Live demo (Lite)
Build a resource calendar with editable headers and application callbacks that control event creation and moving.Next.js Calendar with Day/Week/Month Views · Live demo (Lite)
Connect daily, weekly, and monthly components in a Next.js application with a shared date picker and event data.
Browse more React Calendar and Scheduler tutorials.
Configure a React Calendar Visually
The Calendar UI Builder lets you adjust calendar options in a live preview. Select a React target and the edition you want to use, then download a starter project with your configuration. Continue editing the options in your React code.
Installation and Editions
DayPilot Lite (Open-Source)
Install @daypilot/daypilot-lite-react from npm:
npm install @daypilot/daypilot-lite-reactDayPilot Pro
The React package is included in DayPilot Pro for JavaScript. At npm.daypilot.org, select React and copy the release installation command for daypilot-pro-react. Licensed customers can get their package installation URL in the customer area.
The examples below use React 18 or later. Select Node.js and TypeScript versions that suit your React toolchain. The disposed() check used in the examples is available since DayPilot Pro 2025.3.6607 and DayPilot Lite React 3.20.0; the optional Lite JSX example has the additional requirement described below.
Display a Calendar in a React Component
This TypeScript component displays a week, moves between weeks, and lets users create, move, and resize appointments. The options and event collection are passed from React state. The sample event falls within the displayed week.
Calendar.tsx
import {useState} from 'react';
import {DayPilot, DayPilotCalendar} from '@daypilot/daypilot-lite-react';

export default function Calendar() {
  const [calendar, setCalendar] = useState<DayPilot.Calendar | null>(null);
  const [config, setConfig] = useState<DayPilot.CalendarConfig>({
    viewType: 'Week',
    weekStarts: 1,
    startDate: '2026-09-28',
    eventMoveHandling: 'Update',
    eventResizeHandling: 'Update'
  });
  const [events, setEvents] = useState<DayPilot.EventData[]>([
    {id: 1, start: '2026-09-29T10:00:00', end: '2026-09-29T12:00:00', text: 'Planning'}
  ]);
  const [newEventText, setNewEventText] = useState('New event');
  const [visibleRange, setVisibleRange] = useState('');

  function changeWeek(days: number) {
    setConfig(config => ({
      ...config,
      startDate: new DayPilot.Date(config.startDate!).addDays(days)
    }));
  }

  function updateEvent(event: DayPilot.Event) {
    const changed = {start: event.start(), end: event.end()};
    setEvents(events => events.map(item => item.id === event.id()
      ? {...item, ...changed}
      : item));
  }

  function showRange() {
    if (calendar && !calendar.disposed()) {
      setVisibleRange(`${calendar.visibleStart()} – ${calendar.visibleEnd()}`);
    }
  }

  return (
    <>
      <button onClick={() => changeWeek(-7)}>Previous week</button>
      <button onClick={() => changeWeek(7)}>Next week</button>
      <button onClick={showRange} disabled={!calendar}>Show visible range</button>
      <p>{visibleRange}</p>
      <label>
        New event title
        <input value={newEventText} onChange={event => setNewEventText(event.target.value)} />
      </label>
      <DayPilotCalendar
        {...config}
        events={events}
        controlRef={setCalendar}
        onTimeRangeSelected={args => {
          const event = {
            id: DayPilot.guid(), start: args.start, end: args.end,
            text: newEventText.trim() || 'New event'
          };
          setEvents(events => [...events, event]);
          args.control.clearSelection();
        }}
        onEventMoved={args => updateEvent(args.e)}
        onEventResized={args => updateEvent(args.e)}
      />
    </>
  );
}
The example uses Lite. For Pro, replace the package import with:
import {DayPilot, DayPilotCalendar} from 'daypilot-pro-react';Render <Calendar /> from your application. In a JavaScript/JSX project, remove the TypeScript annotations.
Configuration and React State
Pass Calendar options as React props. Spreading the config object keeps display options together, while explicit props supply the event collection and callbacks. In <DayPilotCalendar {...config} events={events} />, the explicit events prop takes precedence over any events value inside config.
Use setConfig() and setEvents() for changes initiated by your application, returning new objects and arrays from the state setters. Calendar drag-and-drop updates are handled as described below. Each event needs a unique id, start, end, and display text; see DayPilot.Event.data. The end is exclusive, so an event ending at noon occupies time up to noon.
Keep Drag-and-Drop Changes in State
With eventMoveHandling and eventResizeHandling set to "Update", the Calendar updates the event automatically, then calls onEventMoved or onEventResized. The example uses these callbacks to notify React of the change with setEvents(), so other components that use the same state can render the updated dates. The Calendar uses the supplied event objects directly: the original object has already been modified when these callbacks run.
For event creation, the selection callback adds a new object using DayPilot.guid() and clears the visual selection through args.control. Use the same collection for changes from a delete button or an edit dialog. When using a resource calendar, include the new resource value when an event moves between columns.
These interactions update local data only. Add calls to your backend and handle failed saves according to your application's workflow. If you choose the imperative calendar.events API instead, keep the bound React collection synchronized so a later render does not restore older data.
Access the Calendar API
controlRef supplies the initialized DayPilot.Calendar instance, which exposes Calendar methods. In the example, controlRef={setCalendar} stores it in state and enables the visible-range button once it is available.
This is a DayPilot initialization callback, not a native DOM ref. The wrapper disposes the control when it unmounts, but does not call controlRef(null). If a parent keeps the reference while conditionally hiding the Calendar, clear that reference as part of your own state change or check disposed() before using it. Let the wrapper manage control initialization and disposal.
Load Events from Your Backend
The visibleStart() and visibleEnd() methods return the current view's date boundaries, with an exclusive end. Load events that overlap this range and store them in the same React event collection.
To extend the component above, add useEffect to the React import:
import {useEffect, useState} from 'react';Add these state values and the effect inside Calendar(), before its return statement. Replace /api/events with your endpoint returning a JSON array of event objects.
const [loadError, setLoadError] = useState('');
const [reload, setReload] = useState(0);

useEffect(() => {
  if (!calendar || calendar.disposed()) return;
  const abort = new AbortController();
  let active = true;
  const start = calendar.visibleStart().toString();
  const end = calendar.visibleEnd().toString();
  const query = new URLSearchParams({start, end});
  const isCurrent = () => active && !calendar.disposed() &&
    start === calendar.visibleStart().toString() &&
    end === calendar.visibleEnd().toString();
  setLoadError('');

  async function load() {
    try {
      const response = await fetch(`/api/events?${query}`, {signal: abort.signal});
      if (!response.ok) throw new Error(`Loading failed: ${response.status}`);
      const events: DayPilot.EventData[] = await response.json();
      if (isCurrent()) setEvents(events);
    } catch (error) {
      if (isCurrent() && !abort.signal.aborted) {
        setLoadError(error instanceof Error ? error.message : 'Loading failed');
      }
    }
  }

  void load();
  return () => {
    active = false;
    abort.abort();
  };
}, [calendar, config.startDate, config.viewType, reload]);
Add these controls alongside the existing buttons:
<button onClick={() => setReload(value => value + 1)}>Reload events</button>
<p role="status">{loadError}</p>
The effect runs after the Calendar is ready and after the date or view type changes. It aborts an obsolete request and ignores late results when the view changes or the component unmounts. The dependencies cover this example's date and view controls; include other state that changes your query, such as a selected resource or filter, when you add it.
Render Custom JSX Content
Both editions can render JSX in Calendar events with onBeforeEventDomAdd and in grid cells with onBeforeCellDomAdd. Assign your React element to args.element. For Lite, these Calendar hooks are supported since DayPilot Lite React 5.7.0.
This small helper renders an event title using JSX:
event-content.tsx
import {DayPilot} from '@daypilot/daypilot-lite-react';

// Lite supports this hook at runtime but omits it from CalendarConfig typings.
export const eventContent = {
  onBeforeEventDomAdd(args: {e: DayPilot.Event; element: unknown}) {
    args.element = <strong>{args.e.text()}</strong>;
  }
};
Import eventContent from './event-content' and add its spread after config. Keep the selection, move, and resize callbacks from the complete example:
<DayPilotCalendar
  {...config}
  {...eventContent}
  events={events}
  controlRef={setCalendar}
/>
For Pro, change the helper's package import to daypilot-pro-react as well. The local argument type in this helper covers Lite's missing declaration for the supported event DOM hook. The JSX event tutorial extends the pattern with interactive content and compares it with active areas.
Pro also provides JSX hooks for column headers (onBeforeHeaderDomAdd), time headers (onBeforeTimeHeaderDomAdd), and the corner (onBeforeCornerDomAdd). These are separate from text, HTML, and color customization in the ordinary render callbacks. Header controls in the Lite resource tutorials use active areas; they do not demonstrate Lite header JSX support.
Use the Calendar in Next.js
Place the interactive Calendar in a Client Component by adding 'use client'; at the top of its source file. The Next.js weekly calendar tutorial shows the page/component structure, while the resource and combined-view examples above provide fuller applications. Keep server data access in your application layer and pass or fetch the event data for the client-side calendar.
Availability
Availability of this feature in DayPilot editions:
| Product | Lite | Pro |
|---|---|---|
| DayPilot for JavaScript | ||
| DayPilot for ASP.NET WebForms | ||
| DayPilot for ASP.NET MVC | ||
| DayPilot for Java |